To the Point...Outside points

Thistle, 7 of 9, Victorian Flower Garden. (16" x 16")
To the Point…Outside Points
The question I am asked most by quilters is how I manage to get sharp outside points and crisp inside points. Learn from my experience in this blog, and discover how to get better outside points. (To get tips for inside points see our blog “Pointers…Inside Points and Corners”)
Our new Thistle, 7 of 9, pattern from our growing Victorian Flower Garden, has lots of outside points to grow your skills.
I use our Trace, Baste, Snip & Stitch process for all my hand applique and reverse applique. This process helps to facilitate my sharp outside points.
The basting step stabilizes my fabric and keeps it in place until I remove it. In this process, the basting line is my sew line, removing the basting thread as I go. When I baste with a No. 7 sharp needle and thick thread, like quilting or button thread, it leaves little “holes” in the background fabric that I can see to keep the edges of my shapes very clear. I use these “holes” to know where my point is on my top fabric, and where it needs to be positioned on my background fabric. I do my stitching work with a No. 11 Milliner's needle.
As a right-handed person, I sew with my piece in my lap from right to left with the seam parallel to my body. I sew so that I sweep the raw edge towards me. My excess fabric hangs down my legs, and my left hand holds the rest. I try to keep the spot that I'm sewing flat with the fingers of my left hand underneath.
Let's get started.
1. I take a stitch right into my point. See pic 1.
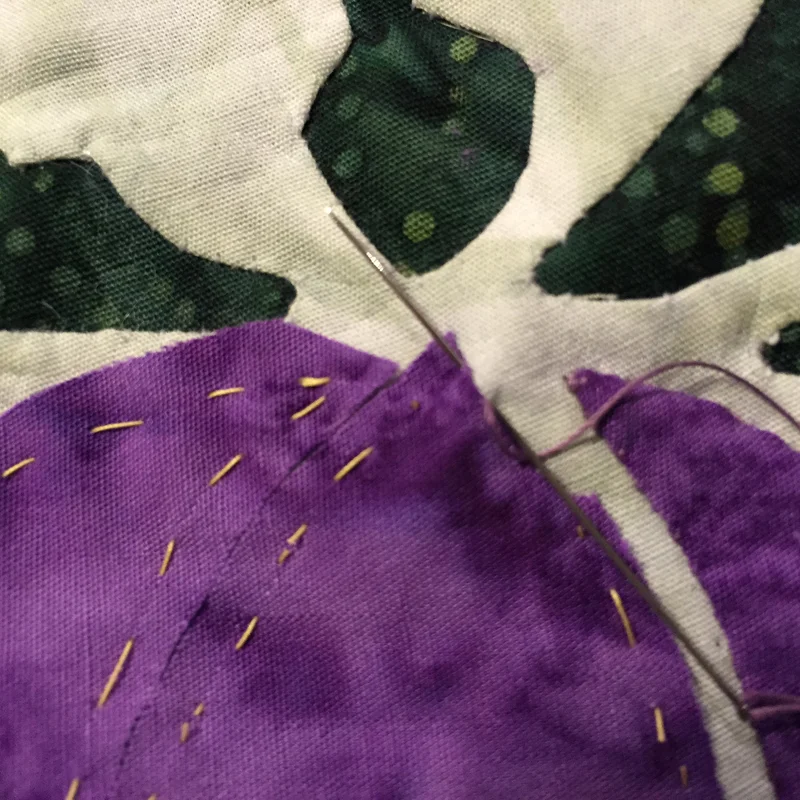
pic 1.
2. I tug outward on my thread to sharpen the stitch. See pic 2.

pic 2.
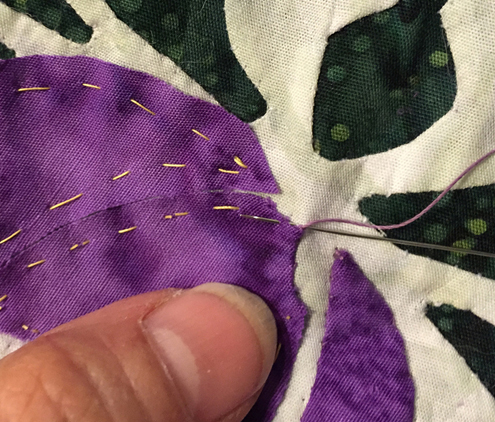
3. I take an anchoring stitch. That means I go into the background fabric as close to my original stitch as I can, and come up right into the center of the point. I tug out on the point again. See pic 3.

pic 3.
4. Using my needle like a windshield wiper, I sweep the raw edge under against the sewed seam of the first side of the point. I tug out on the point again to sharpen it. If necessary, and it usually is, I sweep the threads that pop out under again with my needle. See pic 4.

pic 4.
5.a. Then I send my needle into the background fabric right at the point, and... See pic 5.a.

pic 5.a.
5.b. ...and travel it forward on the backside so that I come up into the top fabric as close to the point as I can to take my next stitch. When I take my stitch, I catch the fold of my top fabric only. I don't want to catch the fabric I swept under. This keeps the seam allowance and all its threads tucked neatly inside the point. See pic 5.b.
pic 5.b.
6. My point is finished, sharp and crisp. See pic 6.
pic 6.
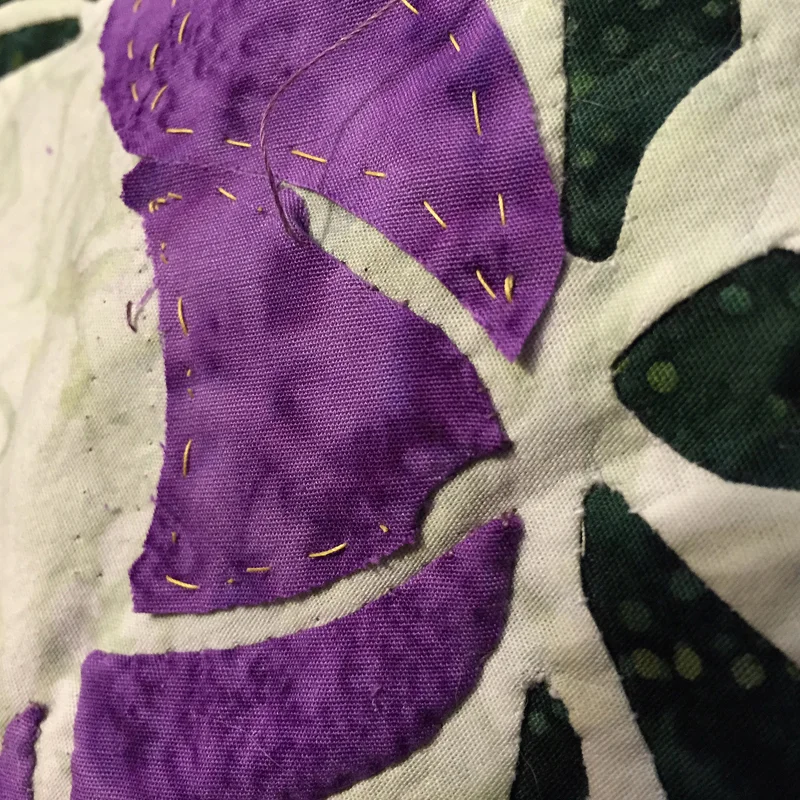
Thistle, 7 of 9, blossom finished.
