Making Half-Square Triangles: HST
Half square triangles are a square that is created with two 90° triangles sewn together along the hypotenuse, commonly called an HST. It’s a great little unit that is used in creating all kinds of fun quilt blocks: Bear Paws, Friendship Stars, Hourglass, Pinwheels, Maple Leaf blocks and Tulip blocks to name a few.
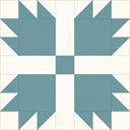
Bear Paw block
Friendship Star block
Hourglass blocks
Pinwheel block
Maple Leaf block
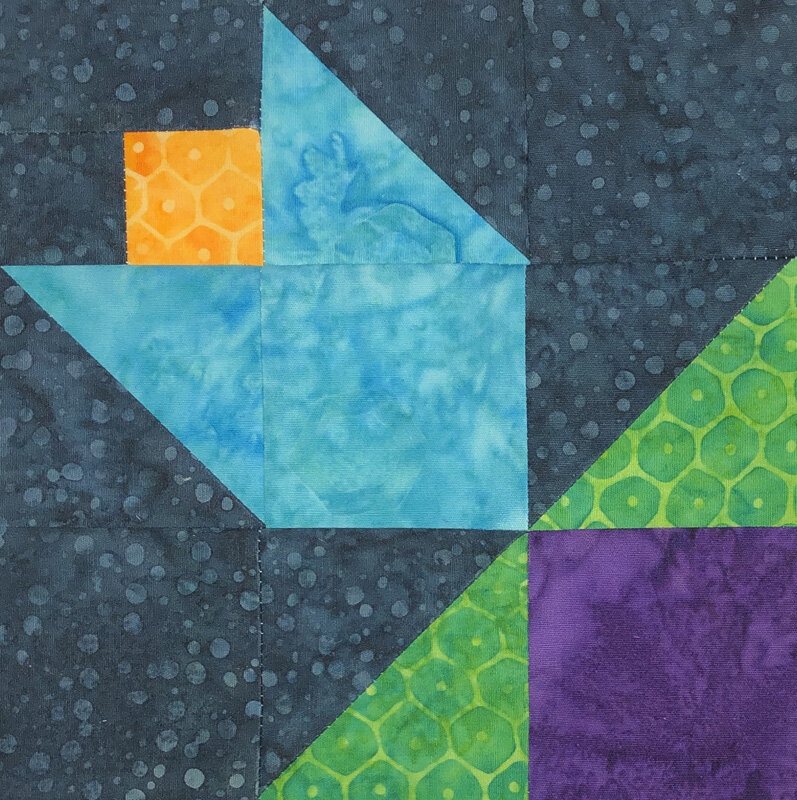
Tulip block
The traditional method for making them had you cut individual triangles, which was tedious, and the diagonal edge was an exposed bias edge. That bias edge is what makes them tricky, because the more you handled the fabric the more it stretched out of shape.
I haven’t cut a triangle for a HST in decades.
Over my 27 years of quilting I’ve learned several tricks for creating HST that keep the bias edge tamed, and in this blog I will share them with you. I use one of two methods depending on how many HST I’m going to make. You might be surprised to know that I haven’t cut a triangle for an HST in decades. I cut squares. You also get two HST from every square. How cool is that?
When I need a lot of HST of the same fabric combination, I use a grid method, still based on squares, that makes it really easy to make a lot of HST accurately and quickly. Once you understand how to turn squares easily into HST you can do this with any pattern, no matter what a pattern’s directions say.
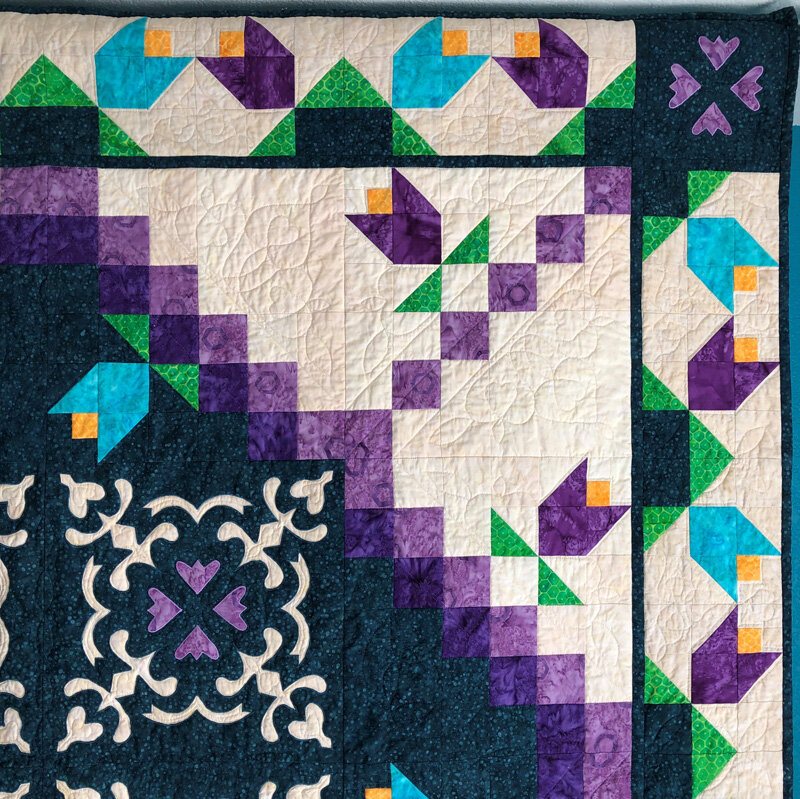
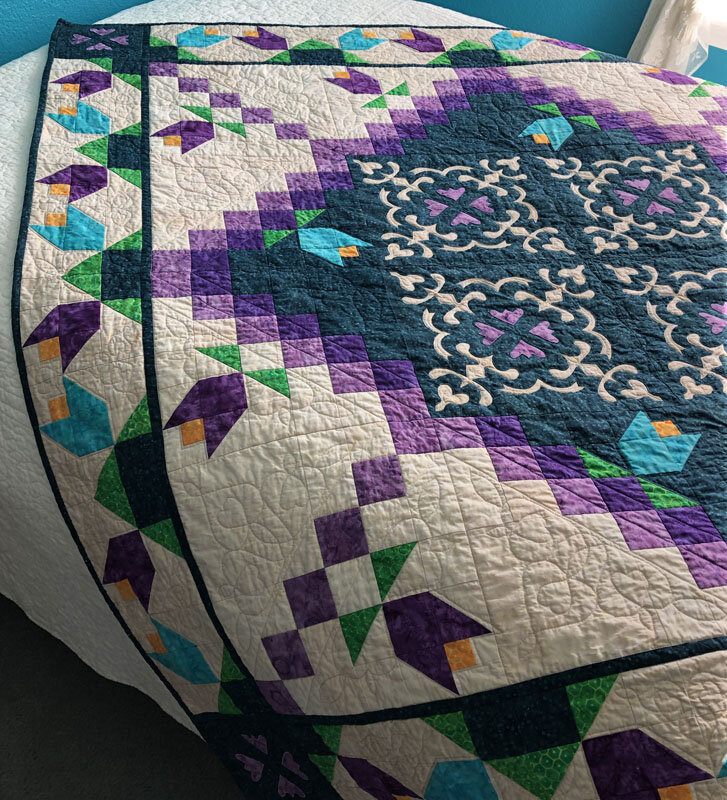
Tulips & Lace Quilt XI (61” x 61”)
So why, when my specialty is reverse applique am I sharing with you how to make HST? Several of our patterns combine piecework with reverse applique and our newest Tulips & Lace Quilt XI pattern, designed in fabrics by Batik Textiles, is one of those patterns. Not only does it combine reverse applique with piecework, but that piecework has a lot of HST.
I designed the Tulips & Lace Quilt with the classic Tulip block surrounding the Spring Love reverse applique blocks. There are 44 purple and turquoise tulips blooming throughout the quilt and they each have two leaf HST and two petal HST, for a total of 176 HST. That’s a lot of HST. If you created them by cutting individual triangles you would have to cut 352 triangles. UGH! that would be so tedious. The pattern’s step-by-step how to directions are thorough for making the quilt, but in a blog I have more space to give extra pointers and more pictures to walk you through the steps. Consider this blog as a bonus to the pattern’s directions. We’ll use Tulips & Lace as our example, but these directions for making HST are applicable to any pattern.
Center Tulip block from quilt made with “Making a few HST Method” using squares.
Let’s get started. To reiterate, I use one of two different methods for making HST depending on how many HST I have to make.
To Make a Few HST
The very center of our quilt has 4 tulip blocks with a dark teal background, so we only need a few HST: 8 leaf and 8 turquoise petal HST. Our HST finish at 2” x 2”, or 2 ½” x 2 ½” unfinished.
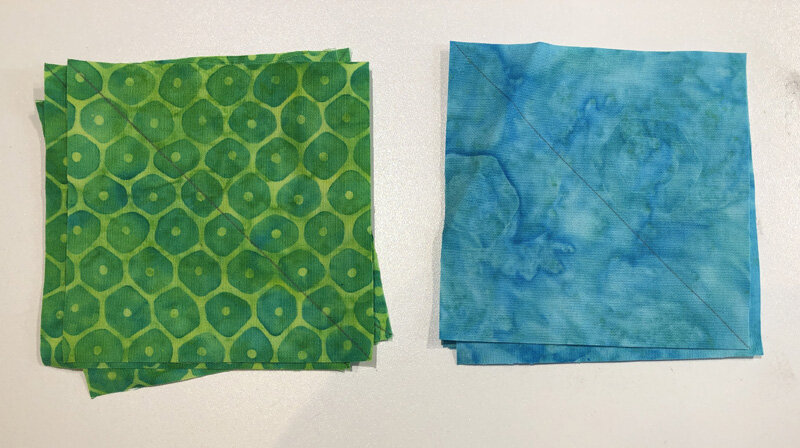
3” x 3” green and turquoisel squares for leaf and petal HST respectively.
Because we get 2 HST from every square, we’ll start with 4 green squares and 4 turquoise squares for the leaf and petal HST respectively, and 8 dark teal background squares. Each square is cut 3” x 3” which is larger than the unfinished dimension. The square is cut larger because we are taking into account the seam allowance of the hypotenuse of each triangle. Because its on an angle, its not as simple as just adding a 1/4” to the finished length of the sides of each triangle. In the pattern we’ve already figured out the math for you and told you what size to cut your squares. (At the end of this blog we tell you how to figure out what size to cut your squares if you are converting the making of HST to this method in a pettern that has a different HST method.)
Pair up each green and turquoise square with a dark teal background square. On the wrong side of one square in each pairing draw a diagonal line from corner to corner. I drew the line on the wrong side of the green and turquoise squares because they were the lighter fabrics, but it really doesn’t matter which squares you choose to draw the line on. If in your quilt your background square was lighter you could draw the line on the wrong side of that square.
Turquoise petal square with diagonal line drawn. Paired right sides together with dark teal background square.
Green leaf square with diagonal line drawn. Paired right sides together with dark teal background square.
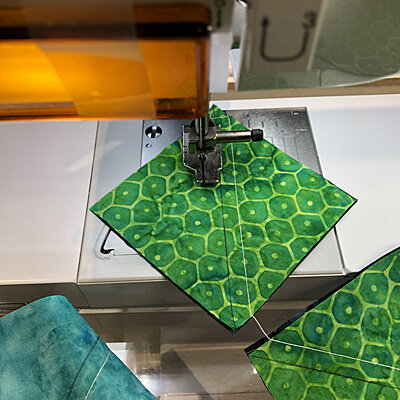
Layer your fabric squares with right sides together. Using your quarter inch presser foot and a tight stitch (18 – 20 stitches to the inch, or 1.8mm – 2.0 mm), sew ¼” either side of the drawn line with a chain piecing method.
Sew 1/4” from drawn line with a tight stitch using chain piecing.
Sew 1/4” on other side of drawn line with a tight stitch using chain piecing.
All squares chain stitched together either side of the drawn diagonal line.
close up of stitching 1/4” either side of drawn diagonal line.
Cut the threads connecting each HST. Then with scissors or rotary cutter/ ruler cut between the stitching on the drawn line, giving you two triangles. Your bias edges are secured with the stitching so won’t stretch. Open up and iron flat. When you iron, use the side of your iron aimed towards the middle of the seam to keep it from distorting your HST as you press it open.
Cut the threads connecting the squares.
I used scissors to between the stitching on the drawn lines of each square, but you could use your rotary cutter/ ruler.
Once cut apart I have two triangles from every square with the bias hypotenuse edge tamed because its already stitched with a tight stitch.
Go to ironing board and press open.
Square up and trim to unfinished size of 2 1/2” x 2 1/2”.
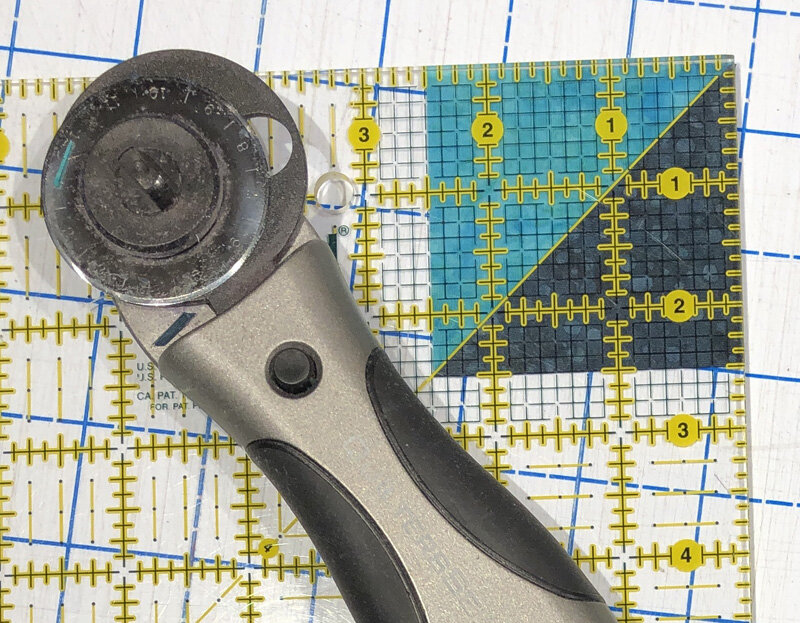
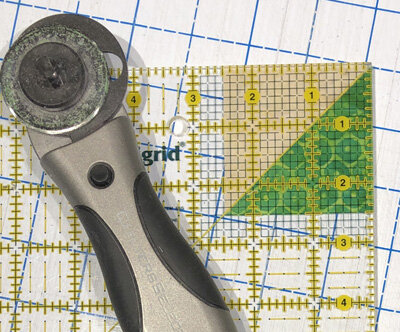
Square up and trim to 2 ½” x 2 ½”. When trimming, lay your ruler so the 45° line lies on the seam. Line up the two sides with the 2 ¾” marks. Trim. Turn your HST and align your ruler again so the 45° line lies on the seam. Now line up the two sides with the 2 ½” marks and trim away the excess. Your HST is ready to sew into your block.
Grid Method:
for Making Lots of HST
So what about when you have a lot of HST to make? When I have a lot of HST to make that are all the same fabric combination I use a grid method. I learned this method from the ladies in my quilting bee 27 years ago. I have no idea whether they invented it or whether they learned it from somebody else, but it’s one of those great tips that I get to share with you.
I’ll focus on the 32 purple petal and the 64 leaf HST I need for the border Tulips for our example.
The corner and border of Tulips & Lace Quilt XI.
First the 32 petal HST. Since I know I get two HST for every square, I need 16 – 3” x 3” squares. So I’ll need a grid that’s 4 x 4 to give me 16 squares, and they’ll each need to measure 3” x 3”.
So I start with a 12” x 12” square of my background fabric and use my ruler to mark every 3” up both sides of my fabric and then every 3” across the top and bottom of my fabric. Using these marks I draw lines horizontally and vertically to make a grid with 16 – 3” x 3” squares.
Drawing out vertical and horizontal lines of 16 square, 3” grid for 32 petal HST using a 12” x 12” square of background fabric.
Next I draw lines diagonally through the corners of my squares. When doing this I’m looking to create a continuous route through the squares.
Drawing in the diagonal lines on the grid creating a continuous path.
Grid for 32 petal HST is ready to layer with petal fabric and sew.
We use the same process for creating the grid for the leaf HST. It will just be larger because we need more, 64, leaf HST. For the leaf HST I started with an 18” x 18” piece of background fabric and drew out a grid with 36 - 3” x 3” squares. This grid will yield 72 HST, 8 more than needed, but it’s easier to work in a square than an odd shape grid. After drawing out the verticals and horizontals with my ruler I drew in the diagonal lines looking for the most continuous route.
Larger grid for making 64 leaf HST for border of Tulips & Lace quilt XI.
Next I layer my gridded background fabrics, right sides together, with their respective top fabrics. The 12” x 12” square with my 12” x 12” purple petal fabric and the 18” x 18” square with the 18” x 18” green leaf fabric. Pin.
It’s time to go to my sewing machine. Using the quarter inch presser foot and a tight stitch (18 – 20 stitches to the inch/ 1.8 mm – 2.0 mm), sew ¼” either side of the drawn line, pivoting in the corners to sew continuously around. Once you have sewed all the way around on one side of the drawn line sew back around on the other side of the line.
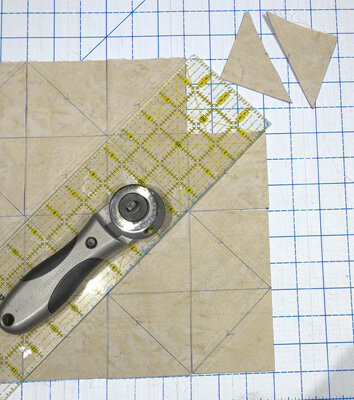
After sewing I usually give the piece a pressing. Then lay the stitched piece out on the cutting table so the drawn side faces up to you. Using your ruler and rotary cutter cut on all the drawn lines in all directions: vertically, horizontally and both diagonals. Don’t move the fabric once you start cutting. Carefully lift the ruler off the piece after each cut and reposition it for the next cut until you have cut on all the drawn lines.
Cut vertical lines.
Cut horizontal lines.
Cut diagonal lines in one direction.
Cut the other diagonal lines. Then you can separate the triangles.
Once all lines are cut separate and gather your triangles.
64 green leaf HST and 32 purple petal HST ready for pressing open.
Once everything has been cut you can pick up your triangles and take them to your ironing board for pressing open. Iron triangle and seams towards the darker side.
Take HST to ironing board and iron open towards darker fabric.
Square up and trim to unfinished size. For this quilt that’s 2 1/2” x 2 1/2”.
Then back to your cutting table to square up and trim to 2 ½” x 2 ½”. When trimming, lay your ruler so the 45° line lies on the seam. Line up the two sides with the 2 ¾” marks. Trim. Turn your HST and align your ruler again so the 45° line lies on the seam. Now line up the two sides with the 2 ½” marks and trim away the excess. Your HST are ready to sew into your block.
Adapting a Pattern
So what size would you cut your squares if the pattern didn’t tell you?
There is a formula.
Take the finished length of the side of your square and add 7/8” (.875) = cut length. This is a minimum addition to the finished dimension. For our quilt pattern I just rounded up to the nearest inch to give a bit more wiggle room. If you are translating a pattern’s HST directions to use either of these methods, make sure you make the decision before you cut your fabric, because you will cut the fabric differently.
This information was taken from the book The Quilter’s Pocket Reference, An Easy Guide to Yardage and More by Peggy Scholley copyright 1994, P.S. Publications. ISBN 0-9642247-0-4. This little book is an invaluable reference tool. (As a side note: I went to look on line to tell you where you could purchase a copy for yourself only to find it’s out of print. Amazon has a few used copies that range in price from $33.00 to 100.00. That’s a ridiculously high price compared to what I paid 25 years ago, but if I were you I would snatch up one of the $30.00 copies now. Its that invaluable as a tool. Over the course of your quilting life it will pay for itself in value.)
Making HST for a Scrappy Quilt
Legacy, Medallion XVI, another Eye of the Beholder pattern that uses HST.
If you are making a scrappy quilt where absolutely every triangle is different you would technically still need to cut individual triangles. The bias will stretch less if you treat your fabric before you cut it with some kind of stabilizer. Traditionally people use Magic sizing, starch or Best Press. The product I use to stabilize fabric is Terial Magic spray-on stabilizer. Someone described Terial Magic to me as “Best Press on steroids”. It will keep those bias edges from stretching.
Tulips & Lace Quilt XI (61” x 61”) hand or machine revese applique with applique and piece work.
But, frankly, I’m lazy enough, that I would still cut squares, following the directions for Making a few HST above, and make two HST of each fabric combination. I would save the second HST for either a duplicate quilt or a future project.
I hope this blog has clarified these easier ways of making HST and helps you to gain confidence to tackle some of the quilt worlds’ classic blocks that are built on triangles, and to make Eye of the Beholder’s quilt patterns that use HST more fun to make: Tulips & Lace Quilt XI, Legacy Medallion XVI and Flowers in the Wind table runner XV kit.
Happy Quilting!

