Round She Goes- Applique Circles
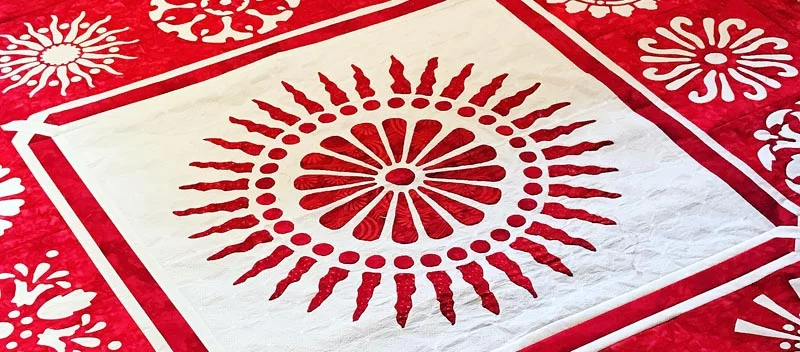
A Red & White quilt with lots of applique and reverse applique circles.
Are you on a quest to stitch smoother, rounder circles when you hand needle-turn applique? Learn from my experience.
The Problem
It’s very easy for our applique circles to have flat edges. I've made my share of wonky circles. In my early years of hand stitching, some of my circles, particularly the smaller ones, more closely resembled stop signs than a balls. But with experience gained over time, my circles have vastly improved.
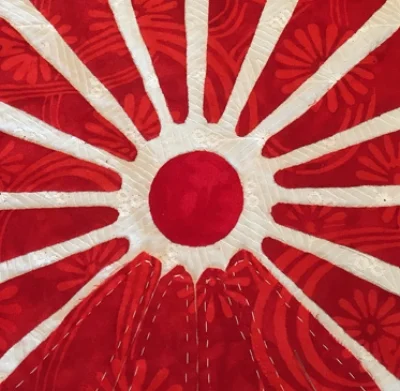
Block 7 from Midnight Explosion Quilt VII. Center circle has a 1/2" diameter.
As I’ve stitched over the years, I find how I think about and really see my circle is as important as my stitching skills. I believe we are training our eyes as well as our hands.
First. Let’s take stock.
Think
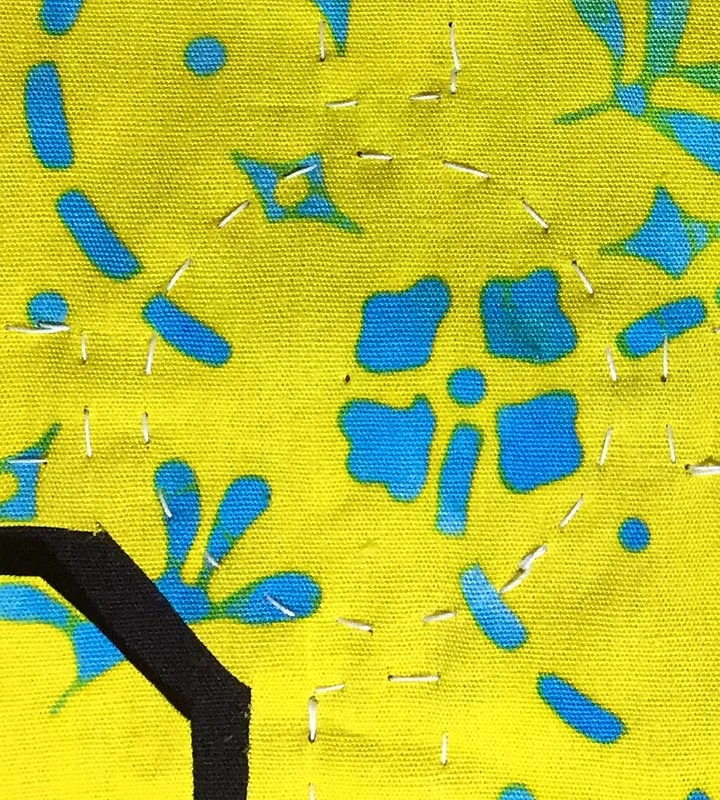
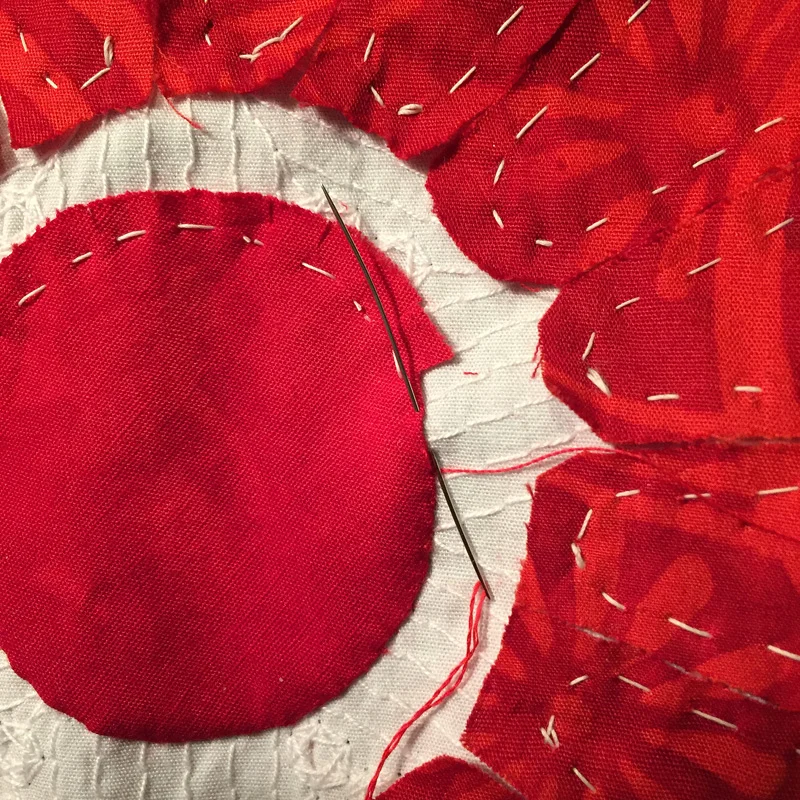
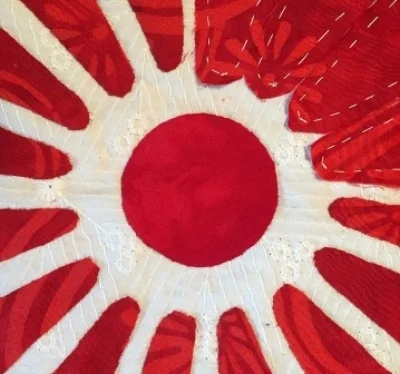
Playing with my own designs, I've created a Red & White Quilt. The quilt's Center circle has a 1 1/2" diameter.
Remember your basic geometry. A circle is made up of a series of points on a curved line.
What we see as a circle is actually many, many points on a curved path. So many points, in fact, that we don’t see points with straight lines connecting them, but a smooth, arcing line.
A stop sign, on the other hand, is created by 8 points set far apart on the curved line. When you connect the points, you get 8 flat sides.
Look
How we look at our circle can help us or hinder us.
Really "see" your circle. Is it large or small? Notice how rapidly the line of the circle arcs. The smaller the circle, as in the yellow center circle above, the sharper and more rapidly it’s going to arc. The yellow circle has a 1/2" diameter.
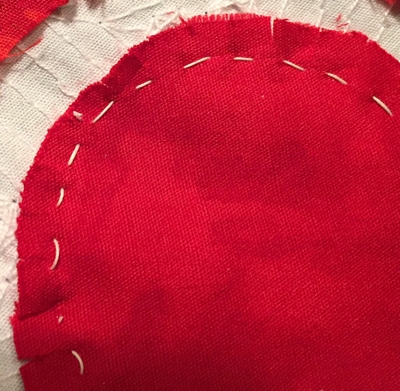
The larger the circle, as in the Red circle to the right, the gentler and more slowly it’s going to arc. The red circle has a 1 - 1/2" diameter.
Be Aware
Now be aware of your medium and tools.
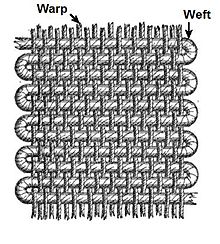
Fabric is made up of straight threads - the warp and weft - that are woven perpendicular to each other.
In weaving, the weft (sometimes woof) is the term for the thread or yarn which is drawn through, inserted over-and-under, the lengthwise warp yarns that are held in tension on a frame or loom to create cloth. Warp is the lengthwise or longitudinal thread in a roll, while weft is the transverse thread. ( to learn more read "Warp and woof".)
No wonder it’s a challenge to get a smooth, steadily curving, round circles. Our medium and tools all operate on straights and angles.
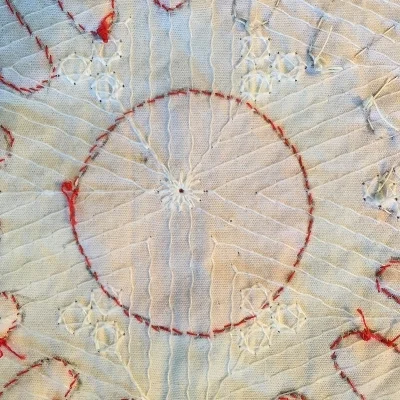
Basted 1/2" diameter center circle from Block 7.
The trick is to make the straights and angles of the fabric bend to an arc.
Now to the Stitching
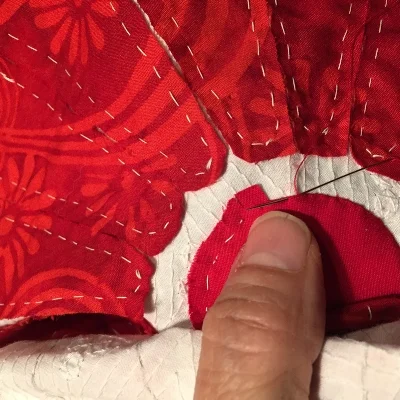
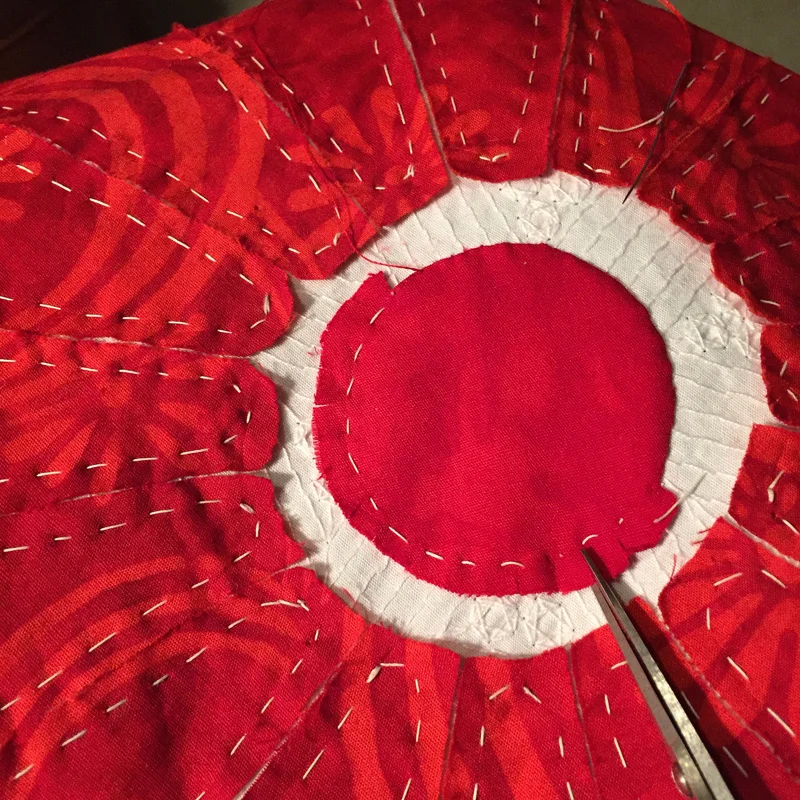
Basted 1 1/2" diameter center circle from Red & White
I use our Trace, Baste, Snip & Stitch process when I needle-turn applique and reverse applique.
Let’s examine how we baste.
Baste
You want to baste along the drawn line of your circle. Using your eye, see where the next peak of the circle is in relation to your last stitch. That’s where you are going to put your next basting stitch. If my circle is large, my stitches can be longer and will be a bit farther apart than if it’s a small, tight circle.
My 1/2" diameter yellow circle was basted with stitches that were 1/8" long and about 1/8" apart.
My 1 - 1/2" red circle was basted with stitches that were about 1/4" long and about 1/4" apart.
If you are unsure about how you are basting the circle, flip the piece over to the front and look. Do the basting stitches communicate a circle to your eye? If not, re-baste adjusting the length and closeness of your basting stitches.
Next, trim away the excess fabric to create a seam allowance of 1/8” – ¼”. Trim your seam allowance parallel to your basting line. I suggest you create a 1/4" seam allowance if this is your first time. You can always trim away to create a 1/8" seam allowance if 1/4" feels like too much as you are needle-turning.
Clipping Up to it, but not through it. Clip perpendicular to basting line and 2-4 threads away from it.
Clip
Clipping is another important step.
It makes the fabric sweep under easily.
The clips make the bias (cross-grain) of the fabric accessible to work for you when making the perpendicular fibers of the fabric curve.
Clip into the seam allowance, perpendicular to the basting thread.
Like when you basted, use your eye to see where the circle arcs in relation to your last clip. That’s where you want to make your next clip.
Roughly, you will clip at the beginning and end of each basting thread. Be aware, though, that you can over clip, leaving you nothing to sweep under when you are stitching.
You need to clip deep into the seam allowance. Up to, but not through the basting line, and approximately 2-4 fabric threads away from the basting line.
If you fabric has a "loose" weave, making it more prone to fraying, don't clip quite so deep. See how it behaves as you needle-turn, first. Remember, you can always clip deeper, but you can't un-deepen a clip.
Stitching
Clip every other basting thread.
Remove one basting thread and use your needle to sweep the seam allowance under the fabric circle. Take a stitch.
One of the benefits of our method, is the little "holes" that are left in the lighter fabric when you remove a basting thread.

When you basted, you were right on the line of your circle. Now, as you remove the basting threads, one at a time, the basting line becomes your stitching line. Once you remove a basting thread and sweep under the seam allowance, you can use the "holes" to get the smooth shape of your circle. You are also always using your eye, too. Sweep your fabric under until the folded edge aligns with your circle's shape.
Only sweep under little bits of your seam allowance at a time.
I often witness students trying to sweep under ½” or more of the seam allowance at a time before taking a stitch. Its very difficult to accurately align your folded edge with the curve of your shape when trying to align so much at once. The result is more likely to be a flattened side rather than a smooth arc.
So, one of the keys to smooth, round circles, is a lots of little bits, one at a time. Just sweep under enough seam allowance in front of your last stitch, to align the folded edge with the circular shape created by the basting holes to take ONLY the next stitch.
Sweep, then stitch. Sweep, then stitch. Pop out the next basting thread. Sweep. Stitch. You will find a rhythm once you get going. "Pop, Sweep, Stitch". "Pop, Sweep, Stitch".
It takes lots of stitches, close together, to make a smooth, round circle.
For my red circle, which has a 1 ½” diameter, I had 62 stitches.
For the ½” yellow circle I took 35 stitches.
Hope this helps. Pull out a project and give it a try. Be patient and gracious with yourself as you practice.
Remember, perfection isn't the point. Excellence is...and excellence is a journey.
Happy Quilting!