Setting Triangles: Sashing and Attaching
Fit for a Queen’s centerpiece is Scroll & Fan, Medallion III set on point. To square it up to fit the quilt, you will sash 4 setting triangles and sew them onto the sides of this Center Medallion.
Sashing Setting Triangles. Sewing them onto your quilt.
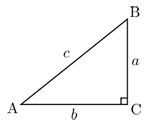
Your four setting triangles are all cut. They are right triangles, meaning they have a 90 degree angle in the corner(C). The sides (a and b) are your triangle’s legs, and the long diagonal side is its hypotenuse(c).
Each one needs sashing on its legs. This will increase the triangles’ overall size. The sashing will increase the length of the hypotenuse of the setting triangle while maintaining the hypotenuse’s 45 degree relationship to the legs, and will be joined at the corner with a miter.

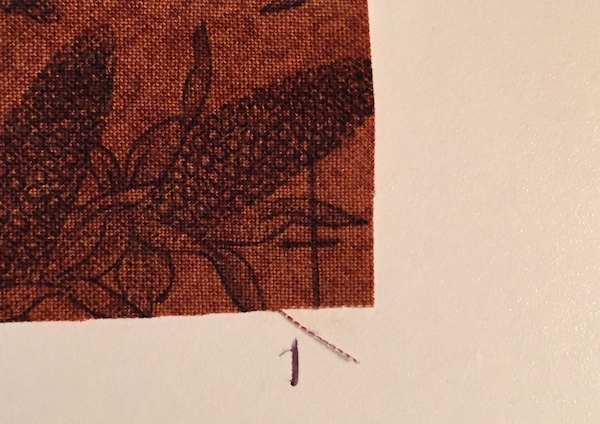
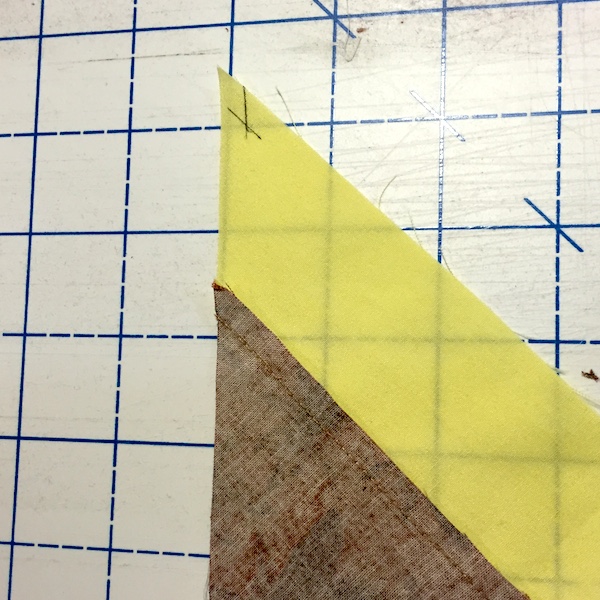
On one end of a sashing strip, mark a dot 1.75” from end and ¼” in from raw edge along ¼” seam allowance of sashing strip.

Mark a dot in the center of the corner ¼” from the raw edge. To find, measure ¼” in from each side. Where they intersect is the center of your corner. Do this for all 8 sashing strips.
With right sides together, pin a sashing strip to leg of the fabric triangle matching dot on sashing with dot in the corner of the triangle. Your sashing strip will be longer than the leg of the triangle. 1.75” will over hang the corner, so you can miter the corner, and at least a 2 7/8” “tail” will overhang the hypotenuse. An aside…to find what length “tail” you would need to overhang your triangle’s hypotenuese, add 7/8” to the cut width of the sashing. I always cut it longer and trim later.)
Using ¼” seam allowance, sew from dot in the corner to edge of triangle.
Iron seam allowance towards sashing.

Do the same on the other leg of the triangle, being careful not to catch the previously sewed on sashing strip as you sew.


In the corner, sew a mitered corner. (Read How to Miter corners tutorial for step by step directions.)
Iron.

Next, you will trim off the sashing “tails” on each leg of the triangle at a 45 degree angle.
Lay triangle flat on your cutting table. Using your ruler, line up the side of the ruler with the triangles’ hypoteneuse, while lining up the 45 degree line on your ruler with the outside edge of the triangle’s leg.

Using your rotary cutter, slice off the sashing “tail”.


Do this to the other leg’s “tail”. You have successfully increased the size of your setting triangle on all three sides.

Sewing your setting triangles onto the center medallion
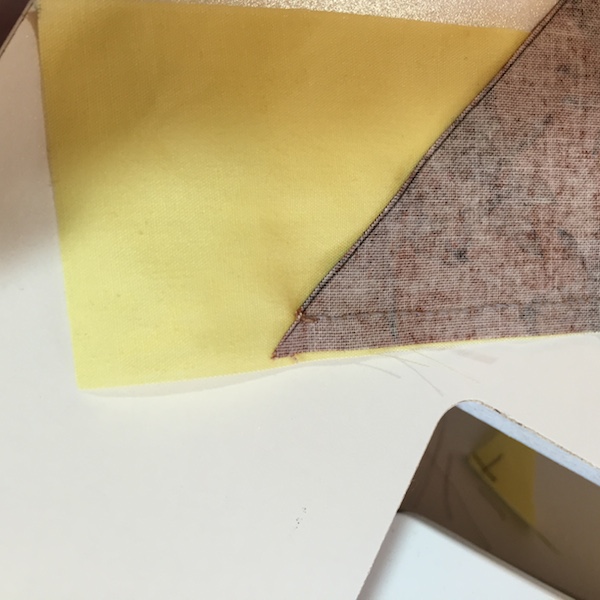
Mark the triangular sashing points ¼” from each raw edge of the point. To find, measure ¼” in from each side. Where they intersect is the center of your point.
Find and mark the middle and the quarters of the hypotenuse of your triangle.

Repeat for all 4 Setting Triangles.
With right sides together, pin a Setting Triangle to one side of the Center Medallion.

Be sure to match and pin the corner dots, quarter marks and middle marks with those same markings on the Center Medallion and easing in the fabric and aligning raw edges. Sew using ¼” seam allowance. Iron flat towards sashing. Do the same on the next adjacent side and for all four sides, until all four setting triangles are stitched to the center medallion.
Iron.
